What is Electronic Challan cum Return?
ECR stands for Electronic Challan cum Return. It is an electronic monthly return to be uploaded by employers through the Employer e-Sewa portal. The return will have the memberwise details of the wages and contributions including basic details for the new and existing members (members who have joined or have left service in the wage month for which the return is uploaded).
The approval of the uploaded ECR will result in the generation of a Challan using which the employer has to remit the dues through online payment. Thus, each ECR will be linked with a remitted Challan, and the ECRs uploaded but not remitted will lapse after 12 days of the generation of the Challan. The upload of ECR each month will relieve the employers from filing any paper return and also the various monthly and annual returns.
Top Benefits
- No paper return is to be prepared and submitted to EPFO.
- No need to submit other returns viz Form 5/10/12A,3A, and 6A.
- Employers will get the confirmation of payment through SMS instantly.
- The members’ accounts will be credited with the contribution every month.
- Employers can view the annual accounts slip.
- For earlier years employers can request for the annual slips through this portal.
The step-by-step process of ECR filing will be as follows
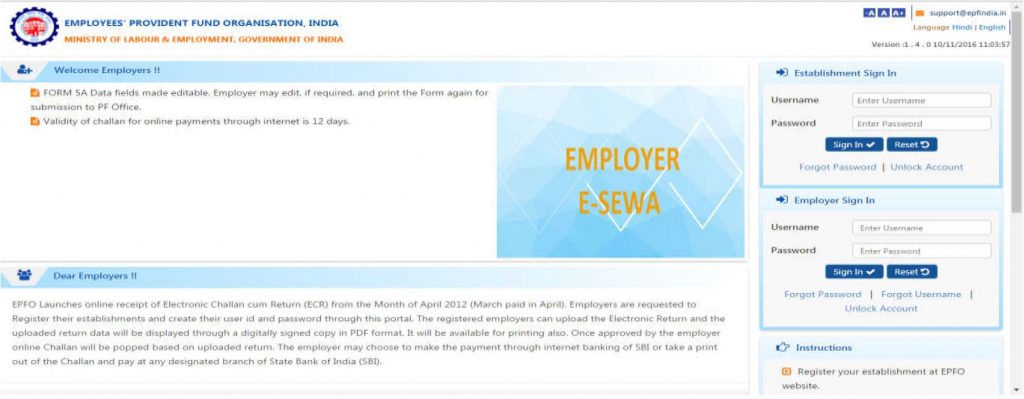
Step-1: Login into the Unified web portal of EPFO (use your ECR portal credentials)
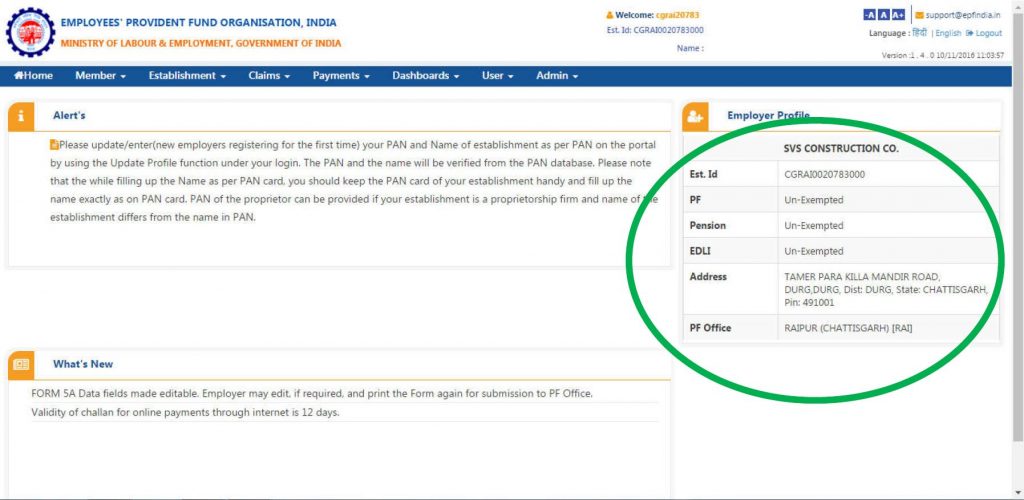
Step 2: After logging, please check whether your PF Code, Estt Name, Address, and Exemption status is correctly shown or not.
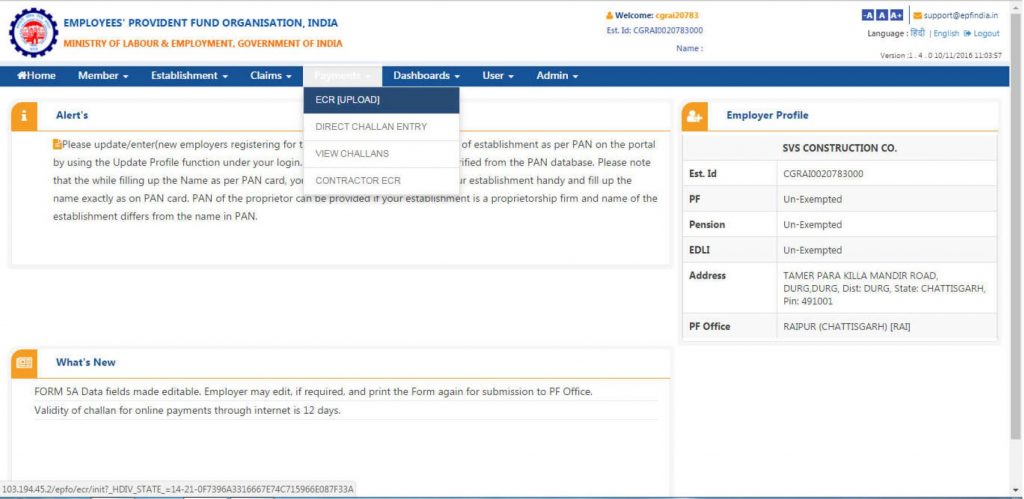
Step 3: Select the “PAYMENT” Menu item for “ECR Upload”
Step-4: Select “Wage Month”, and “Salary Disbursal Date” in the “ECR Upload” Screen.
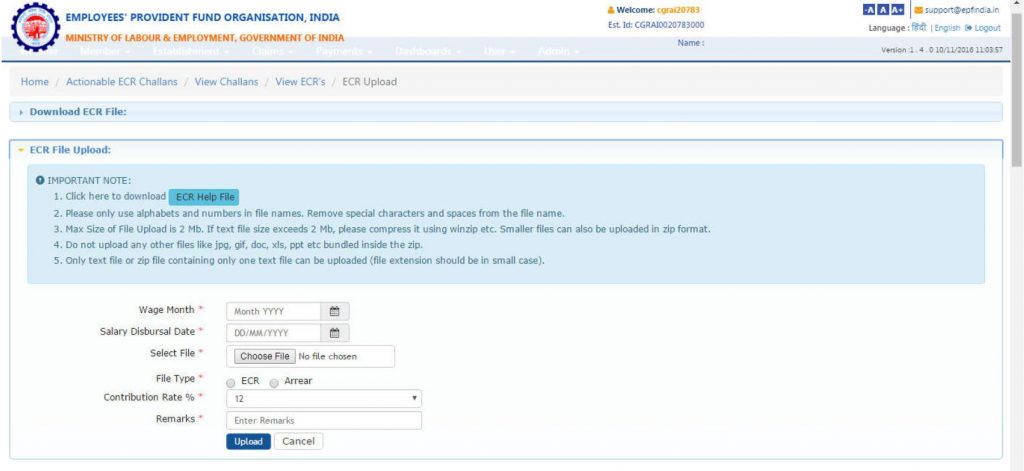
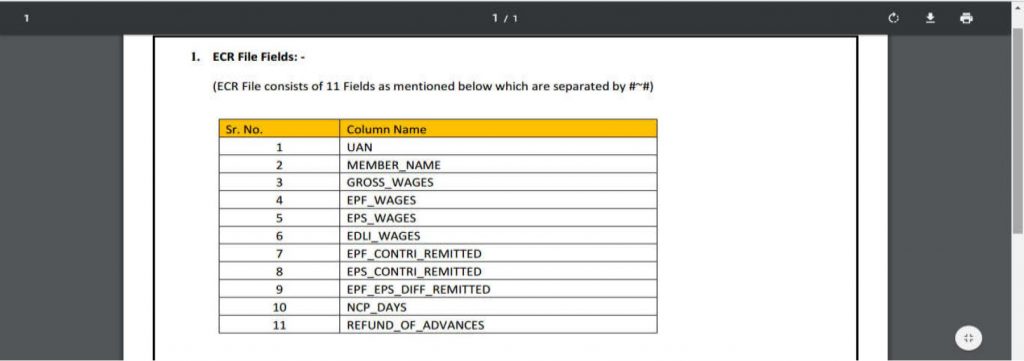
Step-5: ECR (Electronic Challan cum Return) File format can be seen from the “ECR Help File” button available on the Screen.
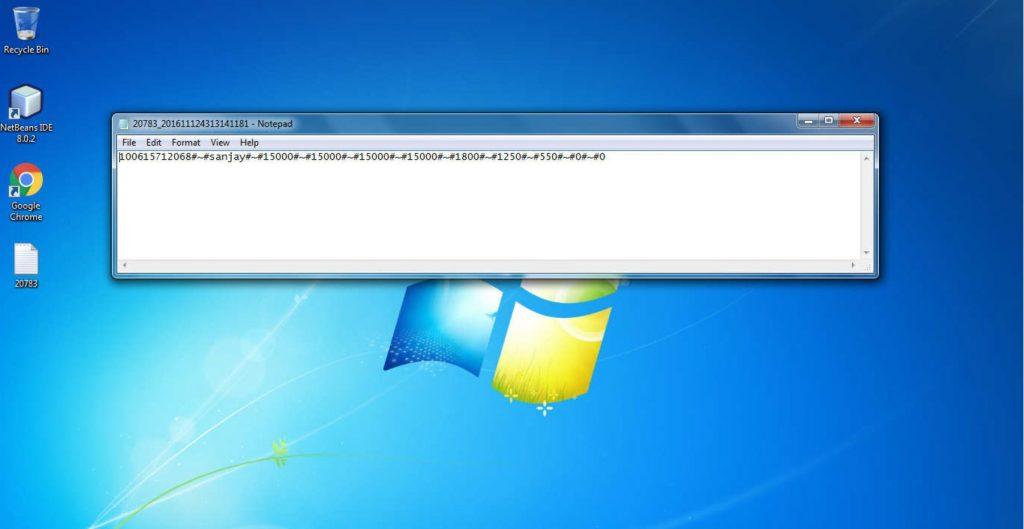
Step-6: Your ECR (Electronic Challan cum Return) text file will look like the one below:
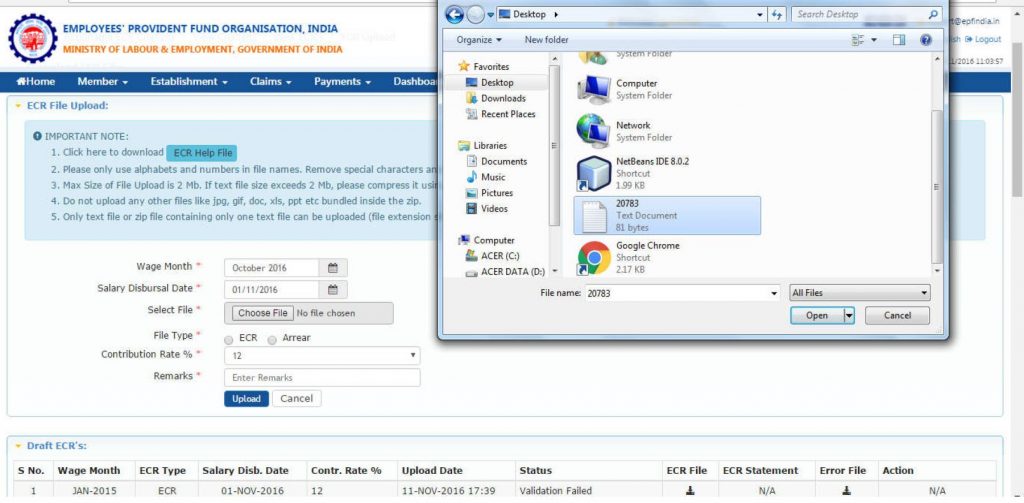
Step-7: Select your ECR (Electronic Challan cum Return) text file to be uploaded for the selected Wage month.
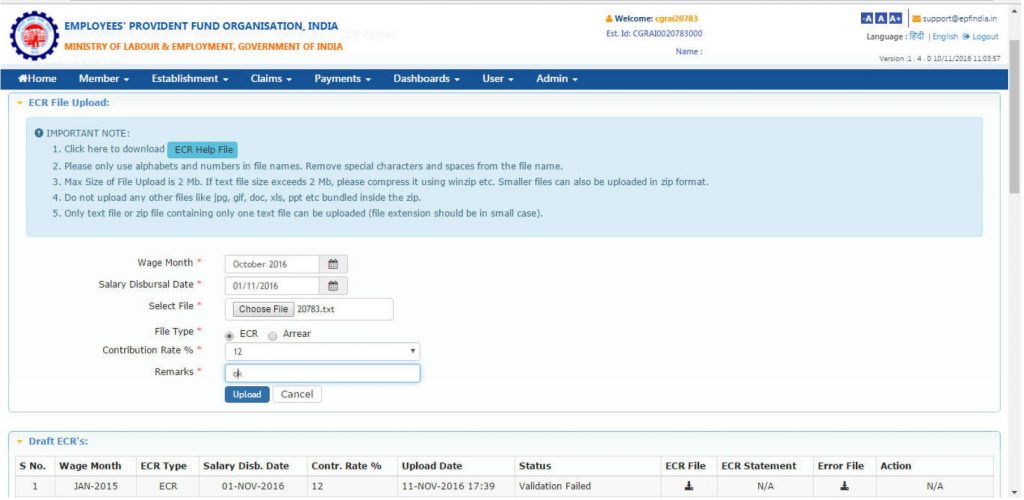
Step-8: Also, select Rate of Contribution (either 12% or 10%, Default value is 12%). Then click on the “UPLOAD” button.
Step-9: For predefined conditions, the uploaded ECR (Electronic Challan cum Return) file will be validated. If successfully validated, the following screen will appear with the message “File Validation Successful”. Otherwise, Error will come.
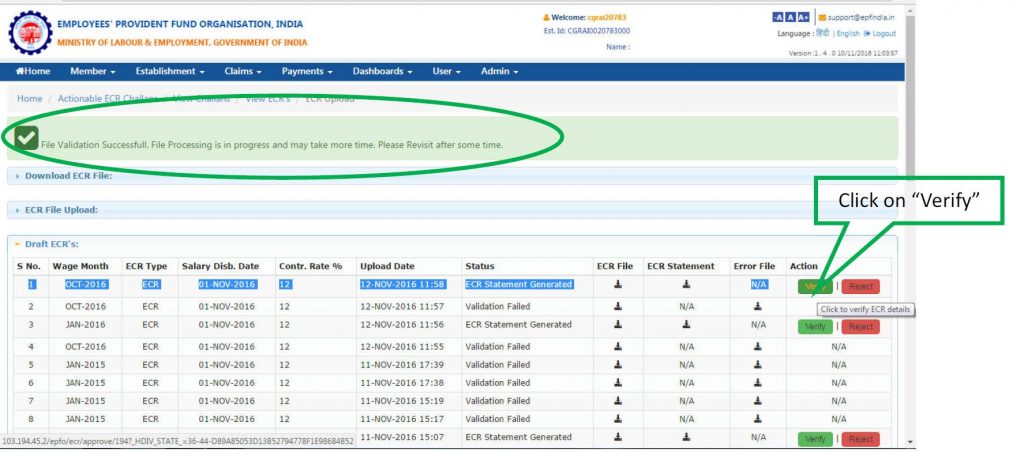
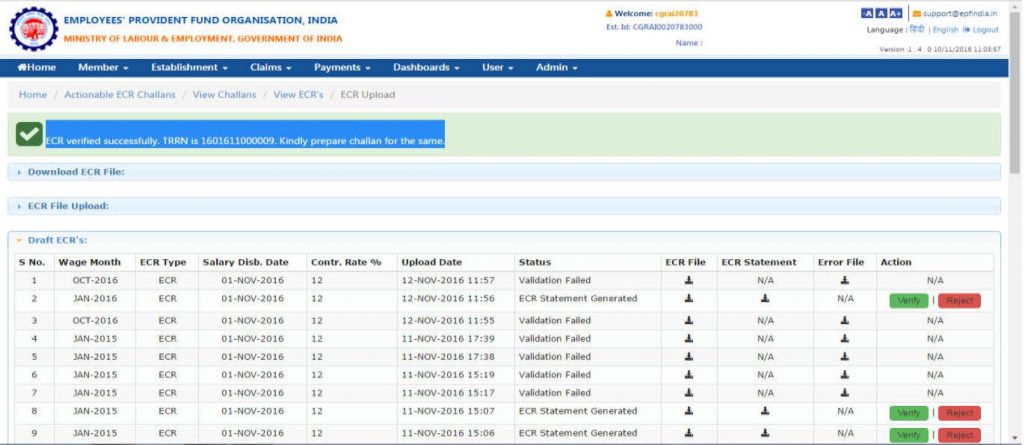
Step-10: Now, TRRN will be generated for the uploaded ECR (Electronic Challan cum Return) file.
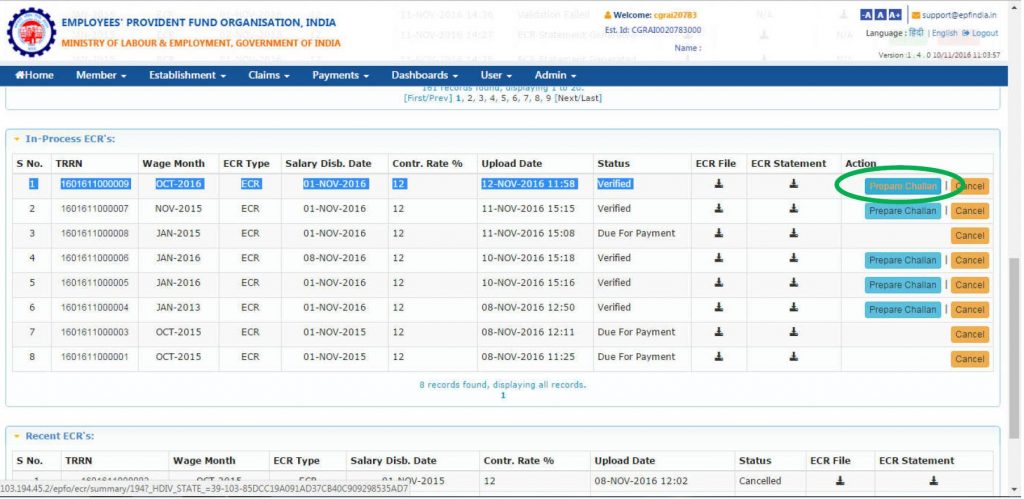
Step-11: Now, click on the “Prepare Challan” button to generate ECR (Electronic Challan cum Return) summary sheet.
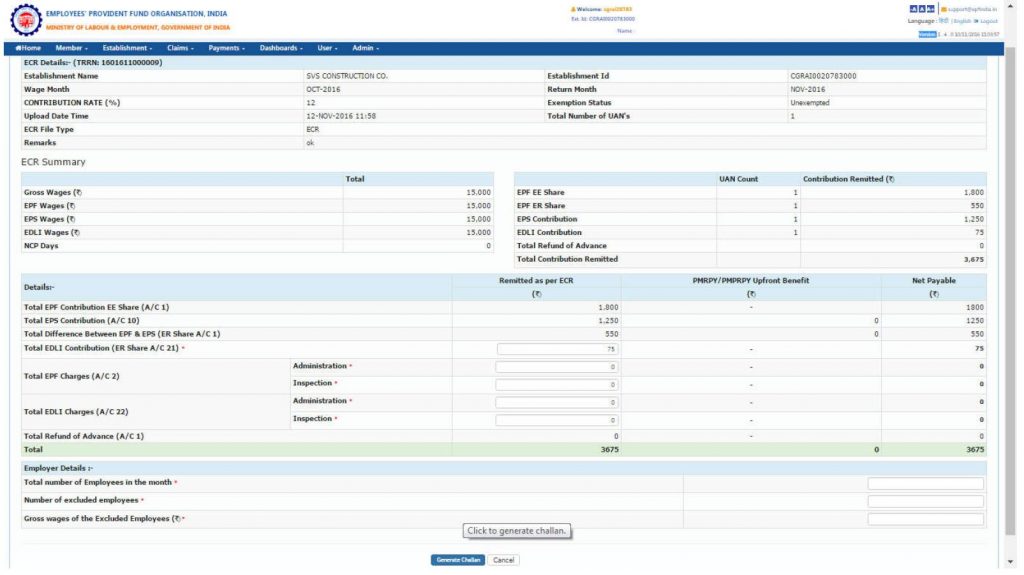
Step-12: Here, please enter Admin/Inspection Charges for A/c No.2 & 22. Also, you can EDIT EDLI Contribution for A/c No.21. Then, click on the “Generate Challan” Button.
Step-13: Now, the following screen will appear. At this stage also, you can EDIT the challan, if required. Click on the “Finalize” button after verifying the challan amount. You can download the Ack file and Receipt file from the “In-Process Challan List”.
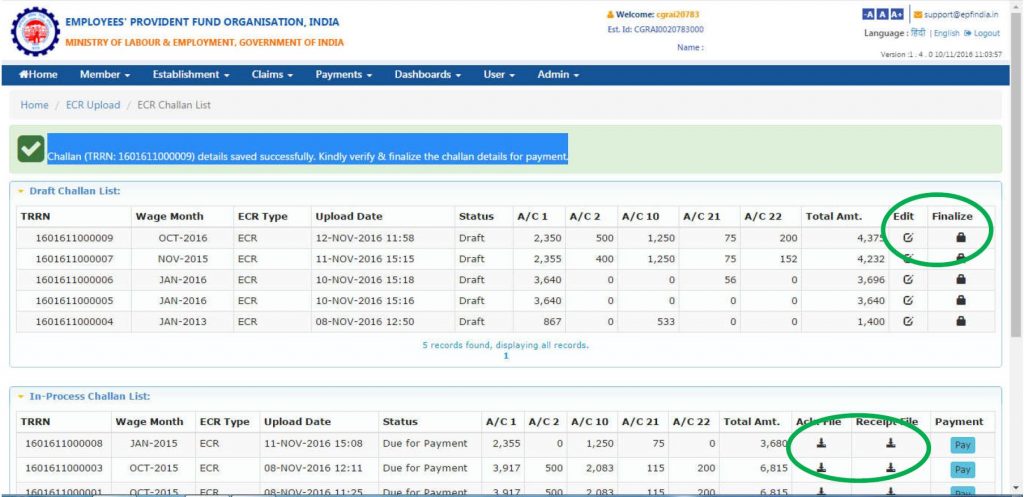
Step-14: Your finalized ECR (Electronic Challan cum Return) Statement and Challan will look like this.
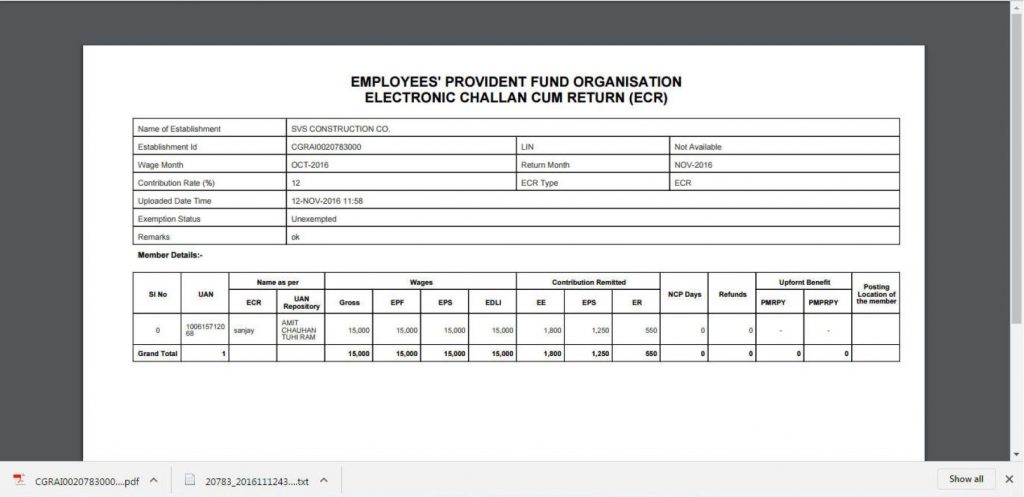
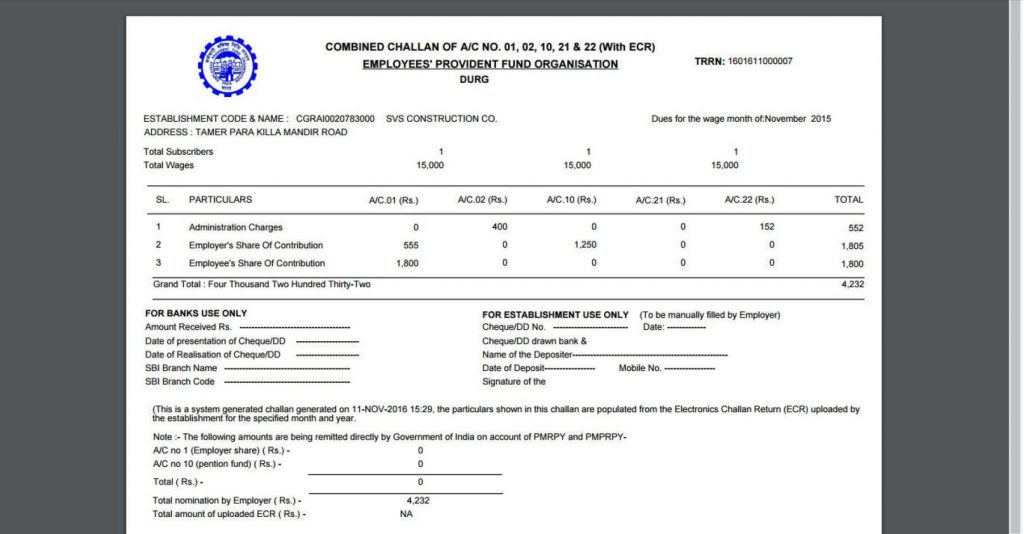
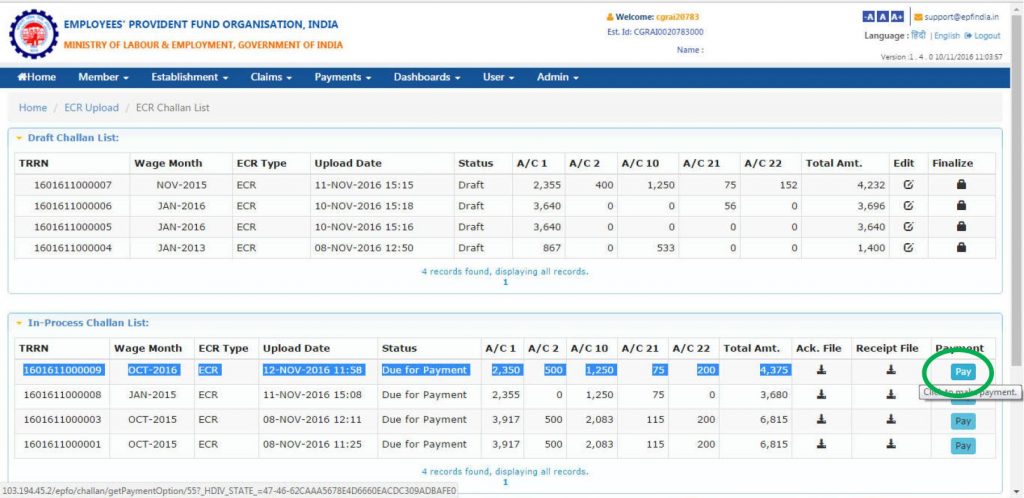
Step 15: Now, your challan is ready for Payment. Click on the “Pay” button.
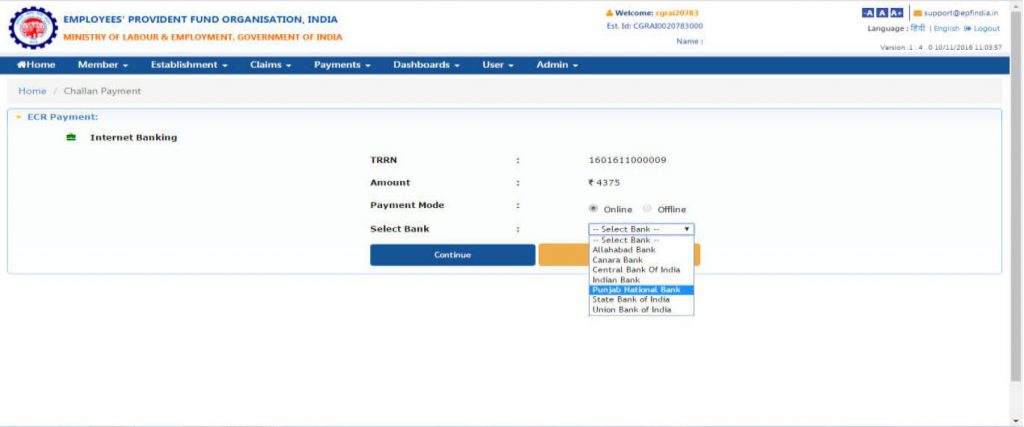
Step-16: Please select “Online” and select your Bank from the list of banks under “Select Bank”, then Click on “Continue”. Then, you will get a Payment Gateway for further processing.
To explore Sumopayroll, Sign up!!


